Fronius Symo x.x-3-S Manuale d'uso
Pagina 21
19
EN
Starting for the
first time
When starting Fronius Datamanager 2.0 for the first time,
-
the Fronius Datamanager 2.0 plug-in card must be installed in the inverter,
or
-
there must be a Fronius Datamanager Box 2.0 in the Fronius Solar Net ring.
IMPORTANT! In order to establish a connection to Fronius Datamanager 2.0, the end de-
vice in question (e.g. laptop, tablet, etc.) must be set up as follows:
-
"Obtain IP address automatically (DHCP)" must be activated
Connect inverter with Fronius Datamanager 2.0 or Fronius Datamanager Box 2.0 to
the Fronius Solar Net
When networking several inverters together in Fronius Solar Net:
Set the Fronius Solar Net master / slave switch on the Fronius Datamanager 2.0 plug-
in card correctly
-
One inverter with Fronius Datamanager 2.0 = master
-
All other inverters with Fronius Datamanager 2.0 = slave (the LEDs on the Fronius
Datamanager 2.0 plug-in cards are not illuminated)
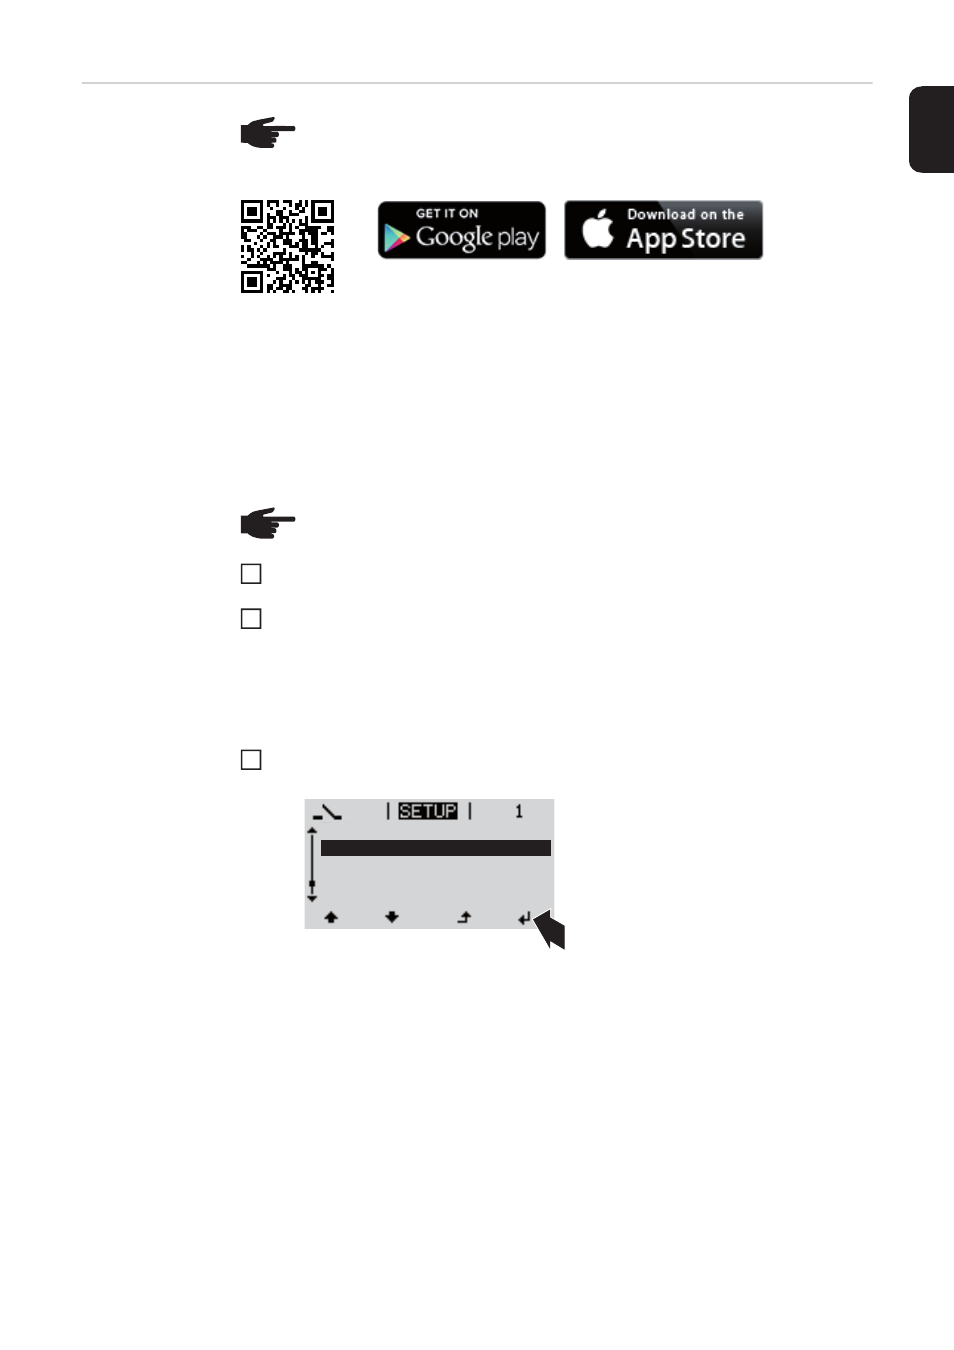
Switch the device into service mode
-
Activate the WLAN access point via the Setup menu on the inverter
The inverter establishes the WLAN access point. The WLAN access point remains open
for 1 hour.
NOTE! Starting the Fronius Datamanager 2.0 for the first time can be made sig-
nificantly easier with the aid of the Fronius Solar.web App.
The Fronius Solar.web App is available in the relevant App store.
NOTE! If the photovoltaic system has only one inverter, steps 1 and 2 below can
be skipped. In this case, starting for the first time will commence with step 3.
1
2
3
Stand by
WiFi Access Point
DATCOM
USB
Clock