Wcs1000c and wcs1000d microphone installation, Wcs1000c and wcs1000d transmitter unit set-up – Proel WCS1000RX Manuale d'uso
Pagina 15
15
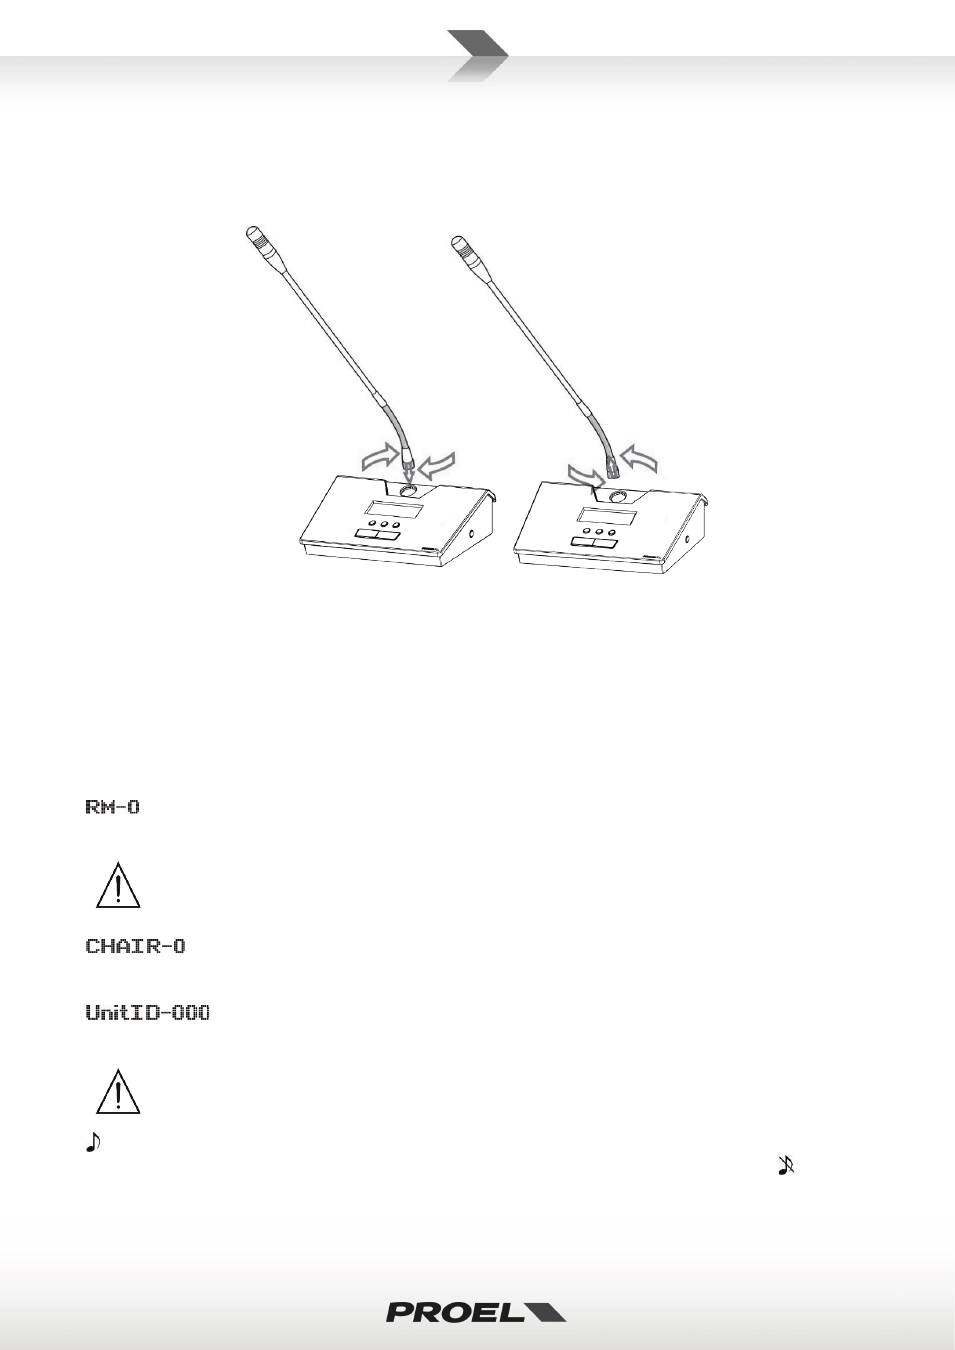
WCS1000C and WCS1000D MICROPHONE INSTALLATION
To install the microphone gooseneck into the base, insert it to the base connector, then turn it until it slides
slightly into the connector. When it is inserted completely (be careful to not force it!), screw the security ring
clockwise:
To remove the gooseneck unscrew the security ring before disconnecting.
WCS1000C and WCS1000D TRANSMITTER UNIT SET-UP
Press the POWER button to switch the microphone unit while keeping pressed the MUTE button: the
microphone unit enters in SETTING mode with the first parameter flashing. You can select the next
parameter by pressing again the MUTE button and you change a parameter value using the and
buttons. If you press again POWER button or wait 9 secs the microphone unit will exit from setting mode.
The parameter are:
This is the room control channel in the range of 0-9,A-F. Each channel corresponds to a frequency and
you must set the same frequency channel previously set on the WCS1000RX receiver.
The receiver and all the transmitter units of the same conference system must be set always on
the same Control Room Channel.
Chairman microphone unit ID setting: this number can be set from 0-9, A-F for a total 16 ID
chairman units in the system. However, in a typical conference system there is only one chairman.
Delegate microphone unit ID setting: this number can be set from 0-255, for a maximum
256 ID different delegate units in the conference system.
All microphone ID in one system must be different: if different units have the same ID number,
the system will not work properly.
Chime of chairman microphone: when the chairman presses the PRIORITY button, the system playa a
chime sound to advise all delegates that he/she is taking the word. Setting this parameter as no chime
sound is played.