Proel WCS1000RX Manuale d'uso
Pagina 7
7
b) Press TALK button on the transmitter.
c) Speaking loudly on the microphone use the transmitter unit’s and buttons to set the
level.
d) The optimal signal level is when all the LED bar are on except the last PEAK LED.
e) Finally raise up the receiver VOL knob in order to have the right sound level in the room but
to avoid feedbacks.
3.
C VOL
Volume knob of chairman microphone.
4.
D1 VOL
Volume knob of delegate 1 microphone.
5.
D2 VOL
Volume knob of delegate 2 microphone.
6.
D3 VOL
Volume knob of delegate 3 microphone.
7. D4 VOL
Volume knob of delegate 4 microphone.
TIP, HOW TO AVOID DISTORTION: the D1-4 VOL knobs set the output level of each receiver channel.
To avoid too high or distorted signals (PEAK LED on) is a good practice to reduce the level on the D1-
4 transmitter using button at first and setting the respective D1-4 VOL knob on the receiver in
the second place.
8.
DOWN button
Pressing this button the frequencies used by each channel are shown in sequence: Room, D4, D3, D2, D1
delegates and C chairman, then back to mode status display. If it’s pressed after the SET button, it scrolls
between the available option (see set-up instructions).
9.
SET
Press it to select the receiver’s option to be set (see set-up instructions). When pressed, the selected
option flashes for about 5 seconds: if within this time neither DOWN or UP button is pressed, the
receiver exit from the setting status.
10.
UP button
Pressing this button the frequencies used by each channel are shown in sequence: C chairman, D1, D2,
D3, D4 delegates and Room, then back to status display. If it’s pressed after the SET button, it scrolls
between the available option (see set-up instructions).
11.
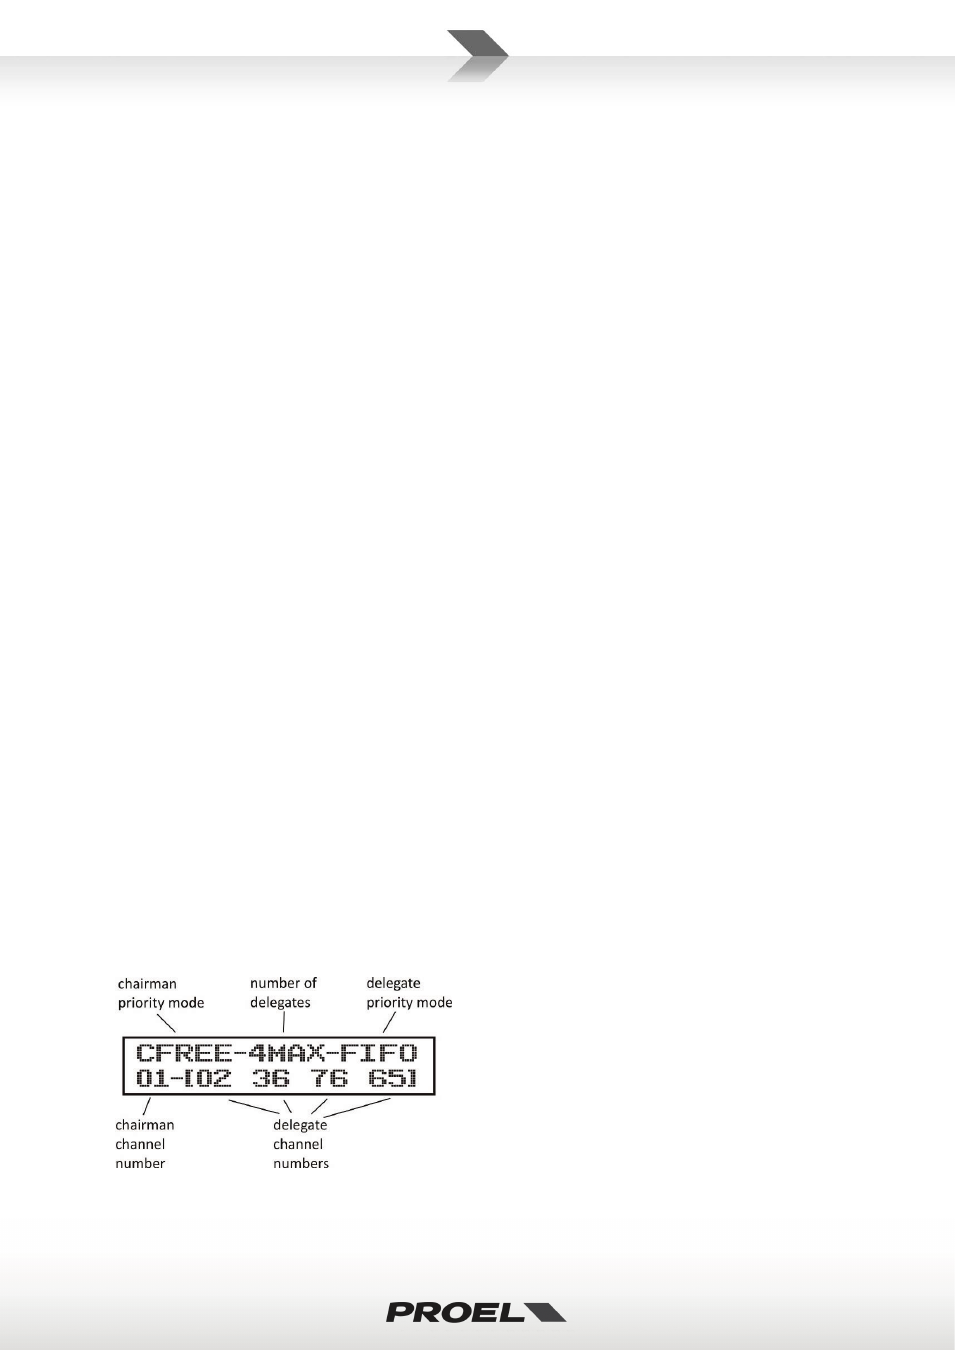
DISPLAY
Displays current setting status and channel numbers.
12.
ANT DATA
Socket for data antenna. Connect here the DATA antenna.