Multi-Contact MA223 Manuale d'uso
Pagina 4
Advanced Contact Technology
4 / 8
www.multi-contact.com
7
6
L
Q
8
9
2,5mm
2
4mm
2
6mm
2
Preparazione del cavo
Cable preparation
(ill. 6 / Tab. 1)
Spellare il cavo.
Lunghezza secondo la Tab. 1
Attenzione:
Prestare attenzione a non tagliare
i trefoli.
(ill. 6 / Tab. 1)
Strip cable insulation.
Length according Tab. 1
Attention:
Take care not to cut individual
strands.
Avvertenza:
per indicazioni sull’uso della spela
fi li PV-AZM e sulla sostituzione dei kit
di lame, vedere MA267
www.multi-contact.com
Note:
for directions on the operation of
stripping pliers PV-AZM... and chang-
ing blade sets, see operating instruc-
tion MA267 at www.multi-contact.com
Raccordi mediante crimpatura
Crimp connections
Per il collegamento dei conduttori ai
tubetti di crimpatura dei connettori PV
ad innesto, raccomandiamo l’impiego
degli attrezzi di crimpatura indicati.
For the connection of the conductors
to the crimping sleeves of the PV plug
connectors, we recommend using the
stated crimping tools.
Crimpatura
Crimping
con pinza per crimpare
PV-CZM-16100A
with crimping pliers
PV-CZM-16100A
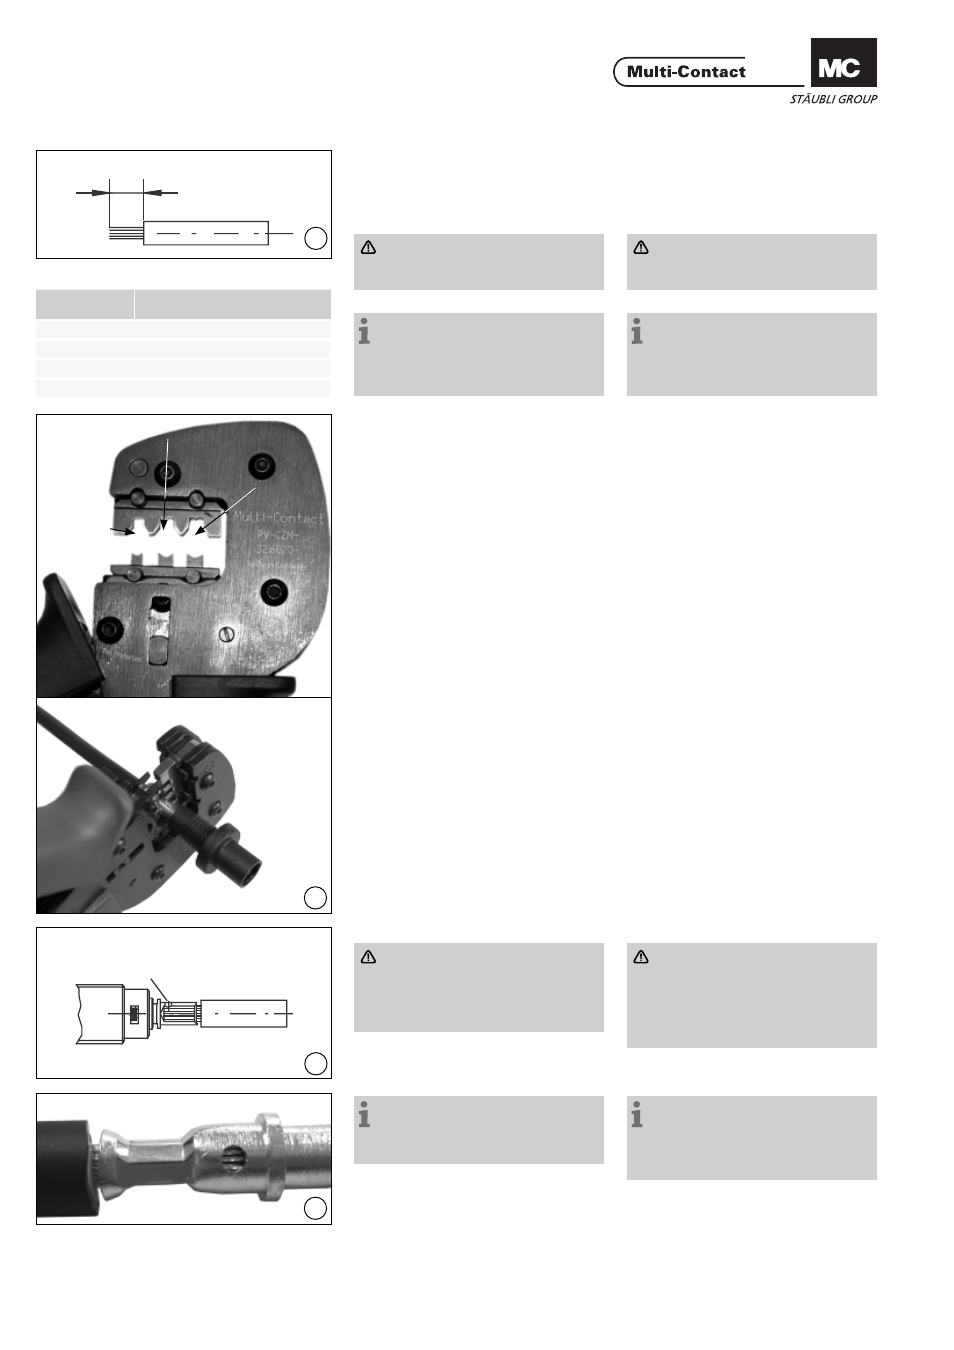
Rimuovere il locatori.
Remove the locator.
(ill. 7)
Inserire la parte metallica del connet-
tore femmina o maschio nella guida
per la sezione appropriata. Inserire il
cavo da sinistra.
(ill. 7)
Place the metal part of the female
or male coupler in the guide for the
appropriate cross section. Insert the
cable from the left.
(ill. 8)
Attenzione:
I trefoli devono essere visibili
attraverso il for Q e la distanza
massima di 1mm non deve esse-
re superata esternamente.
Serrare completamente la pinza per
crimpare.
(ill. 8)
Attention:
All strands of the wires must be
correctly inserted into the bore
hole and visible in sight hole Q.
The max. distance of 1mm must
not be exceeded.
Completely close the crimping tool.
Avvertenza:
per la sostituzione del locatore e dei
relativi inserti di crimpatura vedere
MA251,www.multi-contact.com
Note:
for the replacement of the loca-
tor and the corresponding crimping
inserts, please see MA251 at
www.multi-contact.com
(ill. 9)
Controllare visivamente la crimpatura.
(ill. 9)
Visually check the crimp.
Tab. 1
Tipo
Type
Lunghezza L (mm)
Length L (mm)
PV-BP3/4
6 – 7,5
PV-SP3/4
6 – 7,5
PV-BP3/6
8,5 – 9,5
PV-SP3/6
8,5 – 9,5