Proel PLFT100PCN Manuale d'uso
Pagina 8
7
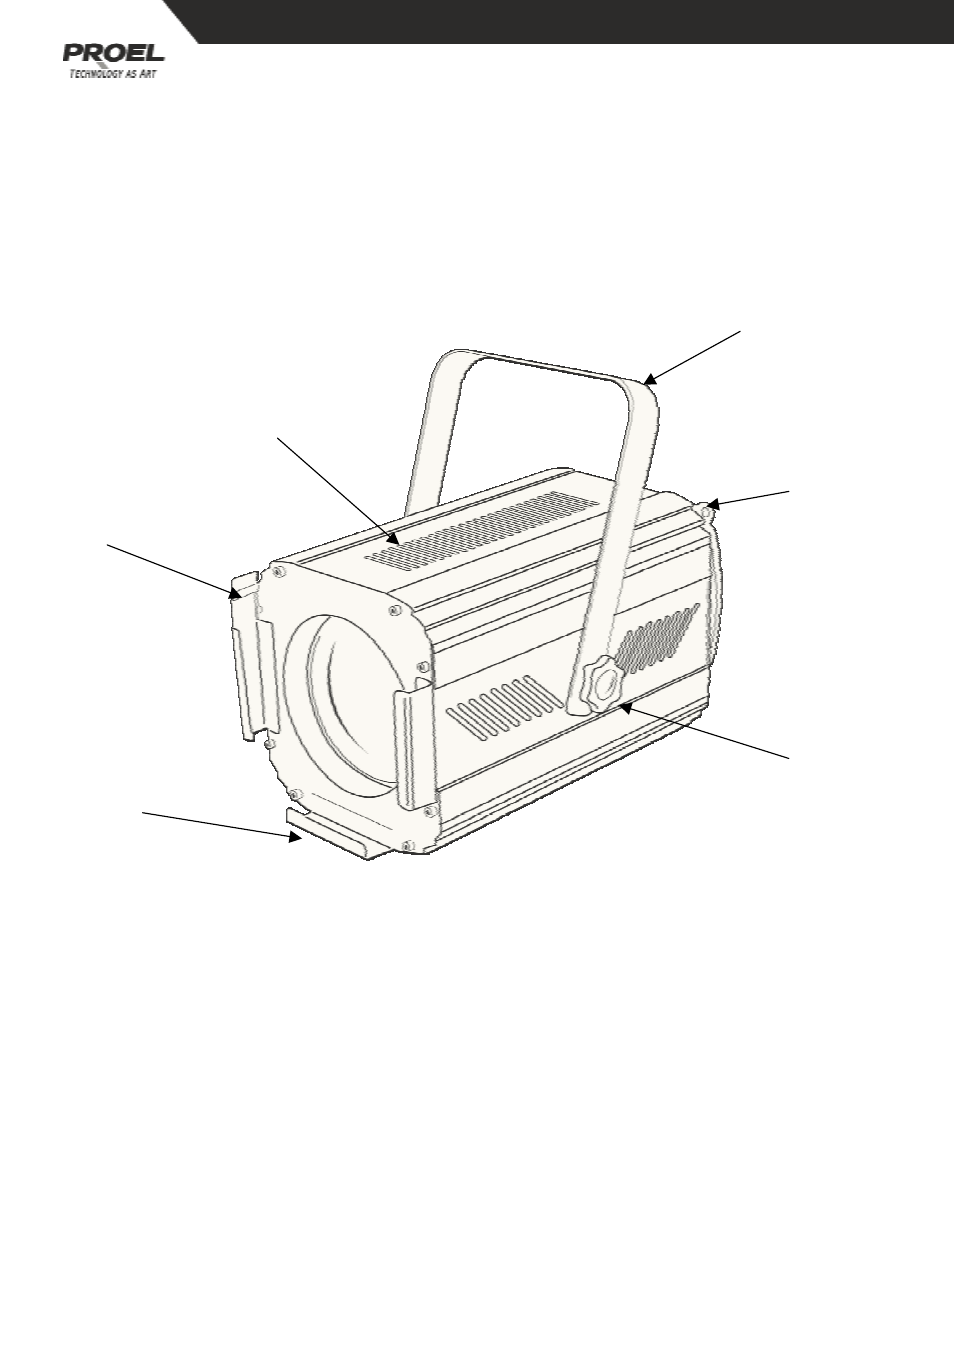
INSTALLING THE PROJECTOR
The projector should be mounted with an M10 bolt through the 11 mm hole in its
bracket (1). For safety the projector should have a secondary fixing with a safety
chain through the fixing eye (2). The projector bracket allows an angle adjustment
of (+ 90°/- 45°) and, once positioned, the knob (3) should be firmly tightened. The
projector mounting bracket can also be easily rotated to be positioned on the
underside of the projector for tripod mounting etc.
FITTING THE LAMP
The lamp access hatch (4) is released by remove the rear screw, located on the rear
of the projector. Insert the T19 1000W lamp into its socket. (Use only the lamp
version that is correct for the mains voltage 120V / 220V / 240V). Insert the lamp
with care and without using excessive force. Use a cloth to hold the lamp and do
not touch the glass of the lamp directly with your hands. Close the access hatch.
Lamp code PLLP1000T19.
POWER SUPPLY
Use the plug provided to connect the mains power to the projector. The blue wire
is neutral (N), the brown wire is live (L), and the yellow and green wire is earth (E).
IMPORTANT: it is essential that each projector is correctly earthed and that
electrical installation conforms to all relevant standards.
1
2
3
6
5
4