Proel BM8X8 Manuale d'uso
Pagina 16
16
7. 24 V DC Power Supply Input
The unit always requires a 24 V DC power supply. Connect the power supply
8. RJ45 Connection Port
Connect the output (fig. 3, ref. 3) to the PAGING MIC input on the MATRIX88 through the CAT5UTP cable
9. Output Level Control
Rotate clockwise to turn the volume up and counterclockwise to turn it down
10. CHIME VOL
Rotate clockwise to turn the chime level up and counterclockwise to turn it down
11. Selettore tipo di CHIME
2 TONE – The announcement will be introduced by a 2-tone chime
4 TONE – The announcement will be introduced by a a 4-tone chime
OFF – Both chimes are turned off
5.
INSTALLATION AND POWER SUPPLY
Caution
• DO NOT place the device close to strong vibrations or in a damp and dusty environment
• For installation and connection, contact only authorized technicians in order to avoid any damage to the
device
• The bottom of the device features four rubber feet to prevent slipping; alternatively, the device can be
semi-recessed in its supporting surface
After having supplied power to the console through the cable provided, connect BM8X8 to MATRIX88 with a
standard CAT5UTP cable.
MATRIX88 features 2 RJ45 input buses; each of these inputs can be connected only to one BM8X8 base.
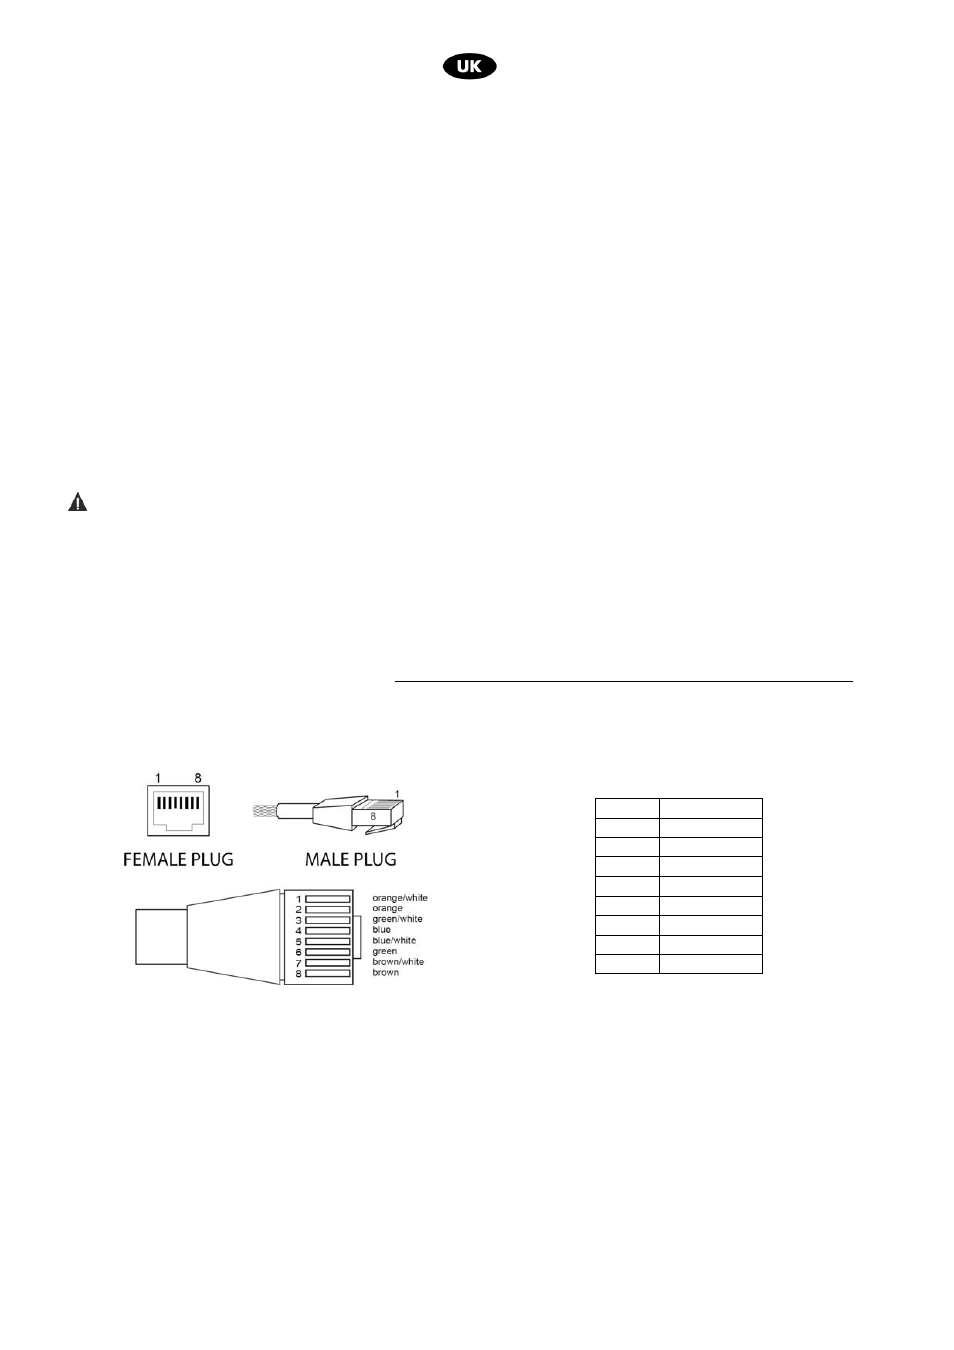
Connection between a UTP CAT5 cable and an RJ45 connector to link a microphone station, according to the
EIA/TIA – 568B standard
:
.
fig.5
6. USE
Switch on the console (the switch is on the back) and select the chime type.
Note:
The installer can adjust the volume level of the microphone and of the chime according to the
environmental conditions.
Pin no. Assignment
1
RS485 B
2
RS485 A
3
GND
4
+ 24V
5
GND
6
+ 24V
7
MIC IN +
8
MIC IN -