Campomatic FP1000 Manuale d'uso
Pagina 11
- 11 -
IT
- Tensione di
alimentazione:
- Potenza
assorbita:
Vedere la targhetta
c a r a t t e r i s t i c h e
r i p o r t a t a s u l f o n d o
dell’apparecchio
- Capacità max. contenitore trasparente:
.............................................. 2700 ml
- Capacità max. bicchiere in vetro: . 1500 ml
- Dimensioni apparecchio (lxpxh) : .....
- Robot: ............... 21 x 26,5 x 42 cm
- Frullatore:............. 21 x 22 x 42 cm
- - Caratteristiche - -
Descrizione apparecchio
(Fig. A)
1) Base
motore
1a) Perno
motore
1b) Piedini di appoggio
1c) Vano
avvolgicavo
2) Prolunga
3) Contenitore
4) Lame
5) Coperchio
contenitore
6) Condotto immissione alimenti
6a) Condotto
removibile
6b) Tasto di sgancio condotto
removibile
7) Pressino
8) Filtro
9) Cono
10) Bicchiere in vetro
11) Coperchio bicchiere in vetro
12) Misurino
dosatore
13) Disco lame per affettare
14) Disco lame per sminuzzare
15) Spatola
Descrizione comandi
(Fig. B)
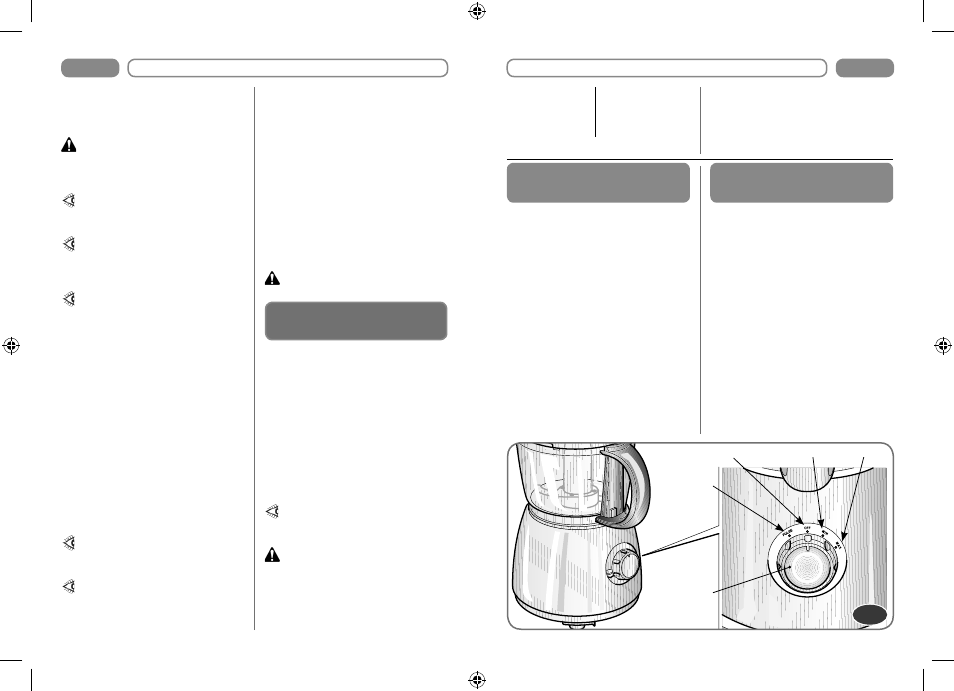
16) Selettore di avviamento
• “PULSE”
Ruotare il selettore (16) in senso
antiorario e tenerlo in posizione
“PULSE” per il tempo necessario alla
lavorazione. Rilasciando il selettore,
lo stesso torna in posizione “OFF” e
l’apparecchio si ferma.
Utilizzare la funzione “PULSE” per
lavorazioni brevi come tritare noci,
carni crude o verdure in modo da
poter controllare i risultati e il grado
di “finezza” desiderato.
• “OFF”
L’apparecchio deve essere sempre
lasciato con il selettore (16) in
posizione “OFF” quando non viene
utilizzato.
“
B
”
PULSE
16
OFF
MAX
MIN
- 26 -
EN
• When pulsing, hold the “PULSE”
position for about 2-3 seconds, check
the result and repeat for the desired
consistency.
The appliance does not start if the
bowl (3), the cover (5) and the semi
removable internal food chute (6a)
are not correctly positioned.
While processing the food make
sure that you do not À ll the bowl (3)
over the recommended quantity
.
Do not insert food that has the
possibility to increase in volume
and therefore exceed the maximum
level of the container.
If you notice that the motor has
difÀ culty with the rotation, switch
off the appliance and check that
nothing is impeding the rotation
or that there is not too much food
to be processed.
• Additional food can be added
through the external food chute (6)
by removing the food pusher (7)
(À g.“H”).
• To add bulky food press the release
button (6b) and remove the semi-
removable internal food chute (6a)
pulling it upwards (Fig.“L”).
The appliance stops immediately.
• To re-start, insert the semi- removable
internal food chute (6a) in the external
food chute (6) until you hear the
engagement “click” (Fig.“G”).
When the cover (5) is removed
from the bowl (3), the device
stops.
Before adding food, cut it into
small pieces to facilitate the
processing.
• To stop the appliance turn the control
knob (16) to “OFF” position:
- Wait until the blades (4) stop
rotating;
- Open the cover (5) turning it
clockwise until you hear the
engagement “click”.
• To remove the bowl (3) from the
motor unit (1) hold the handle and
turn it clockwise (Fig.“D”).
• To remove food residue from the
sides of the bowl (3) wait until the
blades have stopped and use the
supplied spatula (15) or appropriate
tools.
DO NOT use À ngers.
Using the slicing disc (13)
or the shredding disc (14)
• Place the disc stem (2) on the motor
pin (1a) (À g.“C”).
• Place the empty bowl (3) on the motor
unit (1) and turn it “anticlockwise” until
lining up the handle with the reference
spot on the motor unit.
When you hear a “click” it means
the bowl is correctly positioned
(Fig.“D”).
• Place the slicing disc (13) or the
shredding disc (14) on the disc
stem (2) in the centre of the bowl (3)
(Fig.“M”).
If using the shredding disc (14),
place the desidered cutting side
facing upwards.
The discs blades (13, 14) are very
sharp; handle them with great
care.
• Place the cover (5) on the bowl (3)
then turn it “anti-clockwise” until you
hear the engagement “click” (À g.“F”).
- - Use - -