Proel FREE50V3 Manuale d'uso
Pagina 26
26
Nota: The standards package is including two palmar wireless microphones (fig.3) whilst bodypack (fig.4)
transmitter are optional.
fig.5
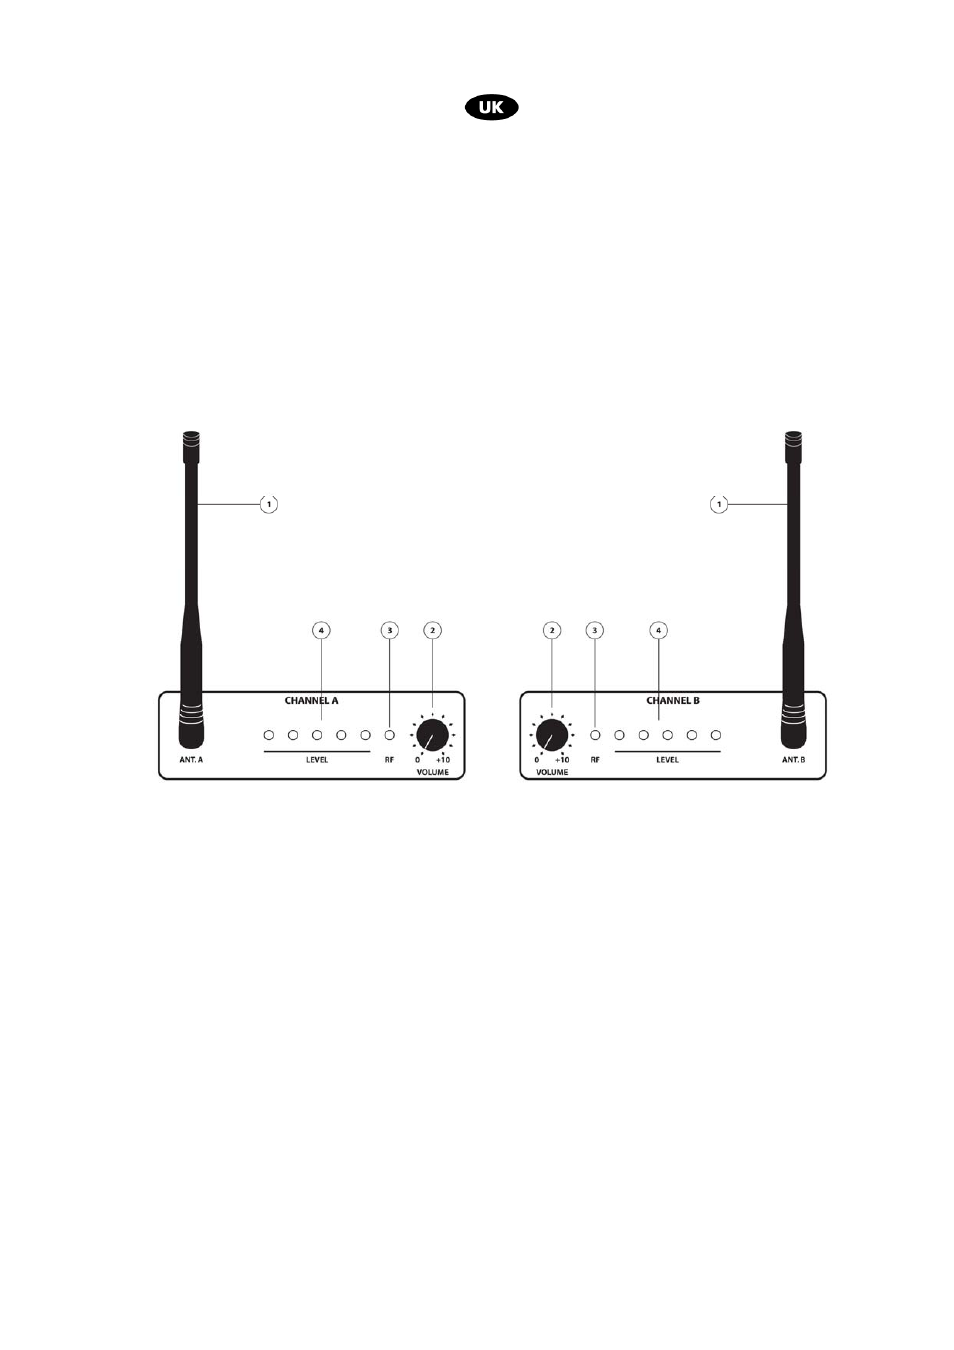
1 Antenna
2 Wireless microphone volume
3 RF synchronization led indicator
4 Vu- meter signal in receipt indicator
FREE50V2 is supplied with Two receivers (fig.6) and with two VHF wireless transmitters (fig.4), For use
the necessary steps are as follows:
• Install the two antenna included in the supply in vertical positions (fig.6 ref.1)
• Insert 9V battery correctly in the dedicated compartment (fig.4,5 ref.1)
• Power on the transmitters (fig.4 ref.2 - fig.5 ref.3) and set reproduction volume (fig.6 ref.2) of each
transmitter. Power on the wireless microphone, the relevant RF led will light indicating that the
receiver is synchronized to transmitter frequency range (fig.6 ref.3),While the respective v-meter
(fig.6 rif.4) will visualize on the receiver the relevant wireless audio signal level transmitted.
Nota: On palmar microphone , commuting the selector on position PWR (fig.4 ref.2) the radio
transmitter is powered ON and the range is transmitted. Contemporaneously Power led (fig.4 ref.3)
is activated .Commuting subsequently the selector (fig.4 ref.5) on position ON the audio signal
reported by the microphone is transmitted
Remove batteries in case of long period or non units use.
1 Battery compartment
2 ON/OFF switch
3 ON microphone status indicator.
4 When led lights, it indicates, independently
of light colour , the battery discharge
5 Mute key
6 Microphone capsule
1 Microphone compartment
2 Microphone input connector
3 Power ON/Stand by switch
4 when the LED is On the battery is
discharged
5 Lavalier Microphone
6 Antenna