12 setup – Proel PLCNDXN Manuale d'uso
Pagina 12
12
SETUP
INSTALLATION
Install the device on a plane surface or install it in a rack.
Rack installation: this device is built for 3-units rack (483 mm). The rack you use should be a double door rack where you can open
the front panel and the rear panel. The rack should be provided with a cooling fan. When mounting the device into the rack, please
make sure that there is enough space around the device, so that the hot air can be passed on. Steady overheating will damage your
device. You can fix the controller with four screws M6 in the rack.
Connect the connection cable of the power unit with the DC in socket. Plug the power unit into your outlet.
SOUND CONTROL
The sound control works via built-in microphone or via the Line-in socket. Connect the sound signal from the mixer with the RCA
socket on the rear panel (input sensitivity 0,1V – 1V).
DMX-512 CONNECTION WITH THE PROJECTORS
The wires must not come into contact with each other, otherwise the fixtures will not work at all, or will not work properly.
Only use a stereo shielded cable and 3-pin XLR plugs and connectors, in order to connect the controller with the fixture or one
fixture with another.
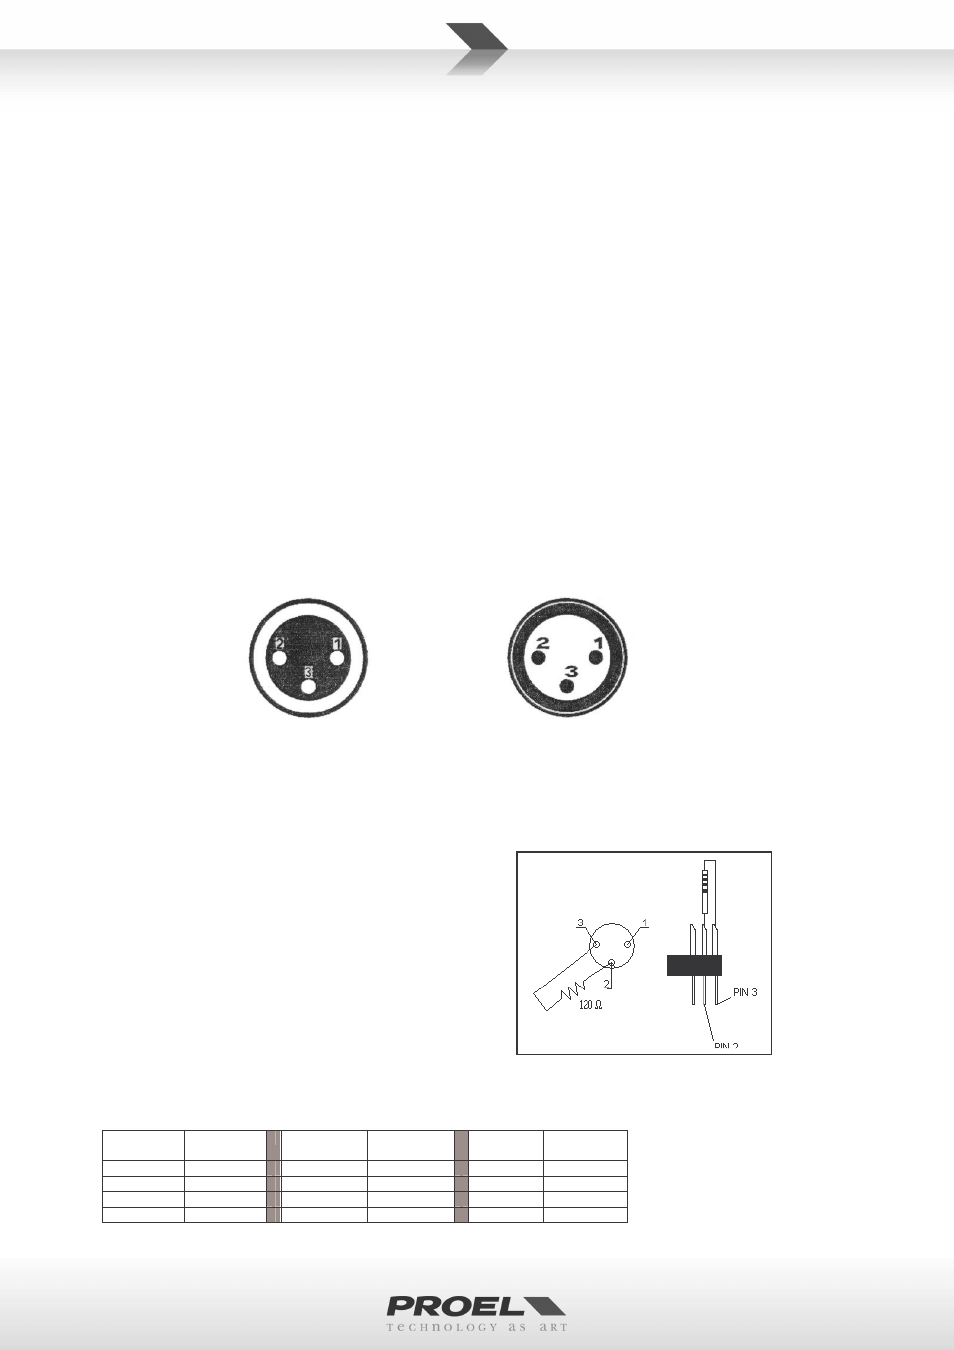
OCCUPATION OF THE XLR-CONNECTION
:
You can adjust the XLR polarity via the DMX polarity selector.
BUILDING A SERIAL DMX CHAIN:
connect the DMX output of the device with the DMX input of the nearest projector. Always connect one output with the input of the
next fixture until all fixtures are connected.
CAUTION:
For all installation, having long signal cables or in the presence of
electrical noise, for example a discotheque, it is recommended
practice to use a DMX terminator: this assist in preventing corruption
of the digital control signal by external noise. The DMX terminator is
simply an XLR connector with a 120
Ω
(Ohm) resistor connected
across pins 2 and 3, wich is then plugged into the DIGITAL THRU
socket on the last projector in the chain. The connection are illustrated
on the right.
PROJECTOR ADDRESSING:
Please note that the DMX operator assigns the DMX starting addressed every 20 steps. You have to address ecery projector to the
respective starting address. Otherwise the channel assignment. Will not be correct. All projectors with the same starting address
work synchronically.
Projector
Starting
address
Projector
Starting
address
Projector
Starting
address
1
1
5
65
9
129
2
17
6
81
10
145
3
33
7
97
11
161
4
49
8
113
12
177
DMX-output
XLR mounting socket
DMX-input
XLR mounting socket
1: ground
2: signal (-)
3: signal (+)
1: ground
2: signal (-)
3: signal (+)